I really like blogging. I really like reading other's blogs. I don't know what it is then that I just can't seem to stick to a routine. I have obviously blogged some recipes, or blogged about our weekend, etc. but I just feel like to sit down and blog about random things always brings a little anxiety. I think if my posts aren't coherent, it's boring but if I read other's random posts I think they are interesting and witty. I used to love writing so much and I guess over the years and I have written less and less so maybe coming into this blogging world I just have a little twinge of "writer's block." Or it could be a case of blog anxiety; I am trying to make sure everything I write about is interesting and not copying other people's styles or topics and what not. It's such a quick and easy thing to do, sit down and type a few ideas, topics, post some pictures, etc. I just need to stick to it!
Any ideas on blog inspiration? Or getting over the hump of just diving on in and post, post, posting?
Hope ya'll have a Spooktacular Halloween! (Pictures from our Halloween festivities to come.)

Sunday, October 31, 2010
Sunday, October 24, 2010
Can't Get Enough of Fall!
I swear everywhere I turn lately there are just more ideas to add to my decorating, ideas, crafting, etc. that involve fall. However, the bank account doesn't really always allow for me to engage in all the projects and decor that I would love so I do have willpower...most of the time. I thought I would share a project that I gathered bits an pieces from different places and came up with some really cute gold pumpkins! Some places I read to spray paint the pumpkins white and draw on them with black. Other places said spray them black and draw on them with chalk. Well, on Real Simple they mentioned using gold spray paint. For some reason, I love gold. I don't love gold jewelry (for my primary pieces, aka, my wedding band and engagement ring) however with decor and with the color-ish scheme of our casa, I love it! It is so warm and inviting and can add just the right accent in certain situations. And what a better season to incorporate gold than fall!? So here is my spray paint project:
These pumpkins were so quick, easy and inexpensive. Sometimes, I just need a project that is quick and provide instant gratification and this was just that and kept right with the season; I loved it! I think I will even set out after the season this year to find some discount fake pumpkins to spray for next year so I can keep then forever.
And to end on, an engagement picture of us taken in October 2008. I loved our engagement pictures and I think that was in huge part to the time of year it was. The leaves were just beautiful, I loved our "fall attire" and we got some really great shots. So, on that note, Happy Fall to all!
 |
| Before |
 |
| After |
 |
| Pumpkins on display complete with a bottle of Vampire wine |
Here is some other fall decor around our house. No, I did not paint the wall for the season, it is orange all year 'round.
 |
| Halloween decor on the mantel |
 |
| Sunflowers from my mom grouped with some adorable baby pumpkins on the TV stand |
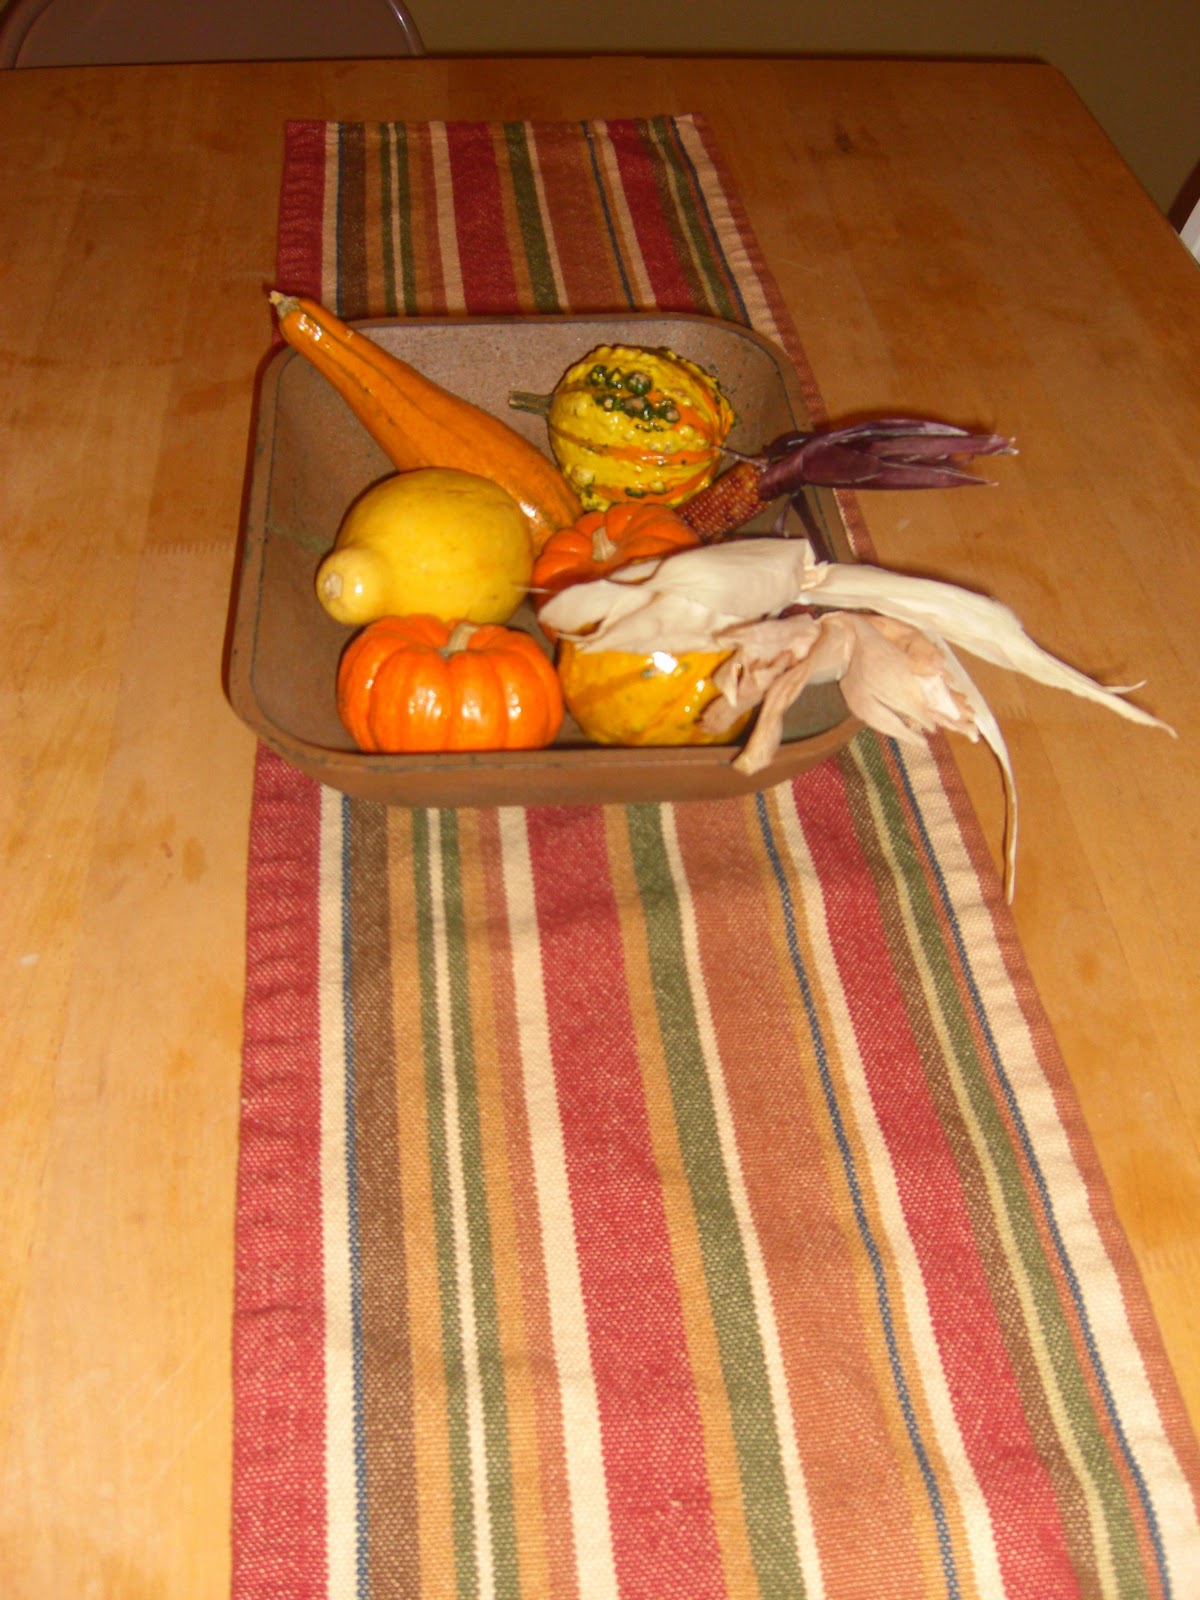 |
| Classic dining room table gourd display |
 |
| Living room coffee table display |
 |
| Monte Vitale Photography |
What are your Fall decor ideas? What are your favorite fall colors and accents? Do you have a special memory that occurred during fall?
Saturday, October 23, 2010
Filling & Tasty Taco Surprise!
I find that trying new recipe after new recipe is so fun and educational, however I sometimes find myself getting away from my own "classics." Everyone has them. Your stand-bys. You know your family loves them, they are something you can (usually) whip up pretty quickly and sometimes if we are lucky, its something we can throw together with some basics we keep in the kitchen. I can't believe I haven't made this stand-by in awhile. It is a recipe I learned back in college and I used to make it quite frequently for the Hubs (then boyfriend) and his roommates. They all loved it and recently I got a call from one of our old roommates and he wanted the recipe to make for a gal he is dating! Love it!
Taco Surprise
Prep: 30 mins
Cook: 45 mins
Feeds: 5-6
1 lb. ground beef
1 pkg. Taco Seasoning
1 onion
Brown hamburger in a skillet with onion. Follow directions on Taco Seasoning packet.

1 box Jiffy corn bread mix
1 can cream corn
1 can diced green chilies
1/2 lb. shredded cheddar
1 jar of your favorite salsa
Follow the directions on the Jiffy cornbread mix while the beef is browning. Once the mix is mixed, add creamed corn and green chilies to the mixture and stir.
Grease a 13x9 pan, preheat oven to 400 degrees and now we will begin layering. Spread a thin layer of the cornbread mixture on the bottom of the pan. Make sure it is just enough to coat the bottom.
 Then, add the beef on top of the cornbread layer. Add salsa on top of the beef layer. (I had some leftover black bean and corn salsa that I had made the day before for a get together so that's why you see those ingredients.)

 Spread the rest of the corn bread mixture of the top of the cheese. The cheese may be peeking out in some spots but that's okay, it will all cook together.


There are a lot of variations to this recipe. For instance, I made a bigger version (an 11x15 pan) so I could freeze half of the pan. You can add more fixin's to your hamburger while it's cooking, more spices if you like spicy. I have added refried beans over the layer of beef before the salsa layer. We also top it with hot sauce and sour cream when we are ready to dig in. Be creative!
Taco Surprise
Prep: 30 mins
Cook: 45 mins
Feeds: 5-6
1 lb. ground beef
1 pkg. Taco Seasoning
1 onion
Brown hamburger in a skillet with onion. Follow directions on Taco Seasoning packet.

1 box Jiffy corn bread mix
1 can cream corn
1 can diced green chilies
1/2 lb. shredded cheddar
1 jar of your favorite salsa
Follow the directions on the Jiffy cornbread mix while the beef is browning. Once the mix is mixed, add creamed corn and green chilies to the mixture and stir.
Grease a 13x9 pan, preheat oven to 400 degrees and now we will begin layering. Spread a thin layer of the cornbread mixture on the bottom of the pan. Make sure it is just enough to coat the bottom.


Sprinkle your cheese over the salsa.


Bake for 45 minutes or until the topping is golden brown. Let sit for about 5-10 minutes and enjoy!

Tuesday, October 19, 2010
Finally, back to a Normal Weekend!
For the past two weeks I have been dealing with my chronic "back issue" and have been laying pretty low. (This is definitely an issue I am finally going to take care of through physical therapy and visiting a spine specialist but let's just say our last couple of weekends have consisted of lots of Dexter, lots of reading, lots of laying in bed, oh, and eating in bed!)
This past weekend was uh-mazing simply because I felt like a normal human again with interaction outside of my house! Friday night we went OUT to dinner (which is rare for us because we love to cook at home so much) because I wanted to celebrate the Hub's raise and bonus! We went to Terracotta Red which is Asian Fusion and it was delicious.
Saturday morning we woke and hung some pictures around the house that I had been itching to get up and I must say they turned out GREAT! I am SO happy with them! We sat around and watched some football and then got together with some friends to head to the pumpkin patch! I haven't been to the pumpkin patch in years and it was SUCH a beautiful PNW day that no one in their right mind would have passed up this beautiful day to partake in such a classic fall activity. Hub have never been to a patch so it was high time he went!
We then picked up some pizzas and adult beverages and headed back to do some carvin'!
 Such a fun, fall day with fun friends!
Sunday, Hub took advantage of the nice weather to smoke some beef and we had my family over for an "impromptu" birthday dinner for my dad. We had smoked beef sandwiched, broccoli casserole (recipe to come) and Mom brought some mashed potatoes. Dessert was Applescotch Crisp (recipe to come). Delicious dinner, quality time with the family and getting my back back to healthy!
What fun, fall festivities is everyone else taking part in these days? Corn mazes? Pumpkin patch? Making cider or applesauces?
This past weekend was uh-mazing simply because I felt like a normal human again with interaction outside of my house! Friday night we went OUT to dinner (which is rare for us because we love to cook at home so much) because I wanted to celebrate the Hub's raise and bonus! We went to Terracotta Red which is Asian Fusion and it was delicious.
Saturday morning we woke and hung some pictures around the house that I had been itching to get up and I must say they turned out GREAT! I am SO happy with them! We sat around and watched some football and then got together with some friends to head to the pumpkin patch! I haven't been to the pumpkin patch in years and it was SUCH a beautiful PNW day that no one in their right mind would have passed up this beautiful day to partake in such a classic fall activity. Hub have never been to a patch so it was high time he went!
 |
| the group |
 |
| all ready to take home |
 |

Sunday, Hub took advantage of the nice weather to smoke some beef and we had my family over for an "impromptu" birthday dinner for my dad. We had smoked beef sandwiched, broccoli casserole (recipe to come) and Mom brought some mashed potatoes. Dessert was Applescotch Crisp (recipe to come). Delicious dinner, quality time with the family and getting my back back to healthy!
What fun, fall festivities is everyone else taking part in these days? Corn mazes? Pumpkin patch? Making cider or applesauces?
Wednesday, October 13, 2010
Quick and Simple with a Little Spice
I have been wanting to try to make Tortilla Soup for some time now and I just always, plain forget about it! I love soup. I could eat bowl upon bowl. Hub loves certain soups. I think he will like Tortilla soup. I was browsing over on my friend's blog and oogling in awe over how she meal plans so strictly! It is really very impressive. If you would like a peek hop on over to the ::the little pieces of our lives::. Back to Tortilla Soup. Mrs. T had it on her meal plan for the week. Oh, that's right, I thought to myself, I need to make that. So, I took some ideas from Mrs. T's quick recipe and some ideas from this recipe over at one of my "go-to" websites, Allrecipes.com. I followed this recipe pretty closely and also added:
2 Fresh jalapeños
1 can of black beans, drained
1/2 bag frozen corn
and came up with this bowl of goodness:
 I also transferred the soup from the pot on the stove into the slow cooker so the scent wafts through the house all day and is warm for dinner. I garnished with a dollop of sour cream, chopped green onions, fresh cilantro and a lime. It would also be delish garnished with some queso fresco or shredded cheese, avocados and fresh tomatoes.
**Happy Birthday to my wonderful Dad! Thank you for always being there, always loving AND giving me my love for food!**
2 Fresh jalapeños
1 can of black beans, drained
1/2 bag frozen corn
and came up with this bowl of goodness:

**Happy Birthday to my wonderful Dad! Thank you for always being there, always loving AND giving me my love for food!**
Tuesday, October 12, 2010
Easy-Bake Potatoes
I sure do love a quick and easy side dish. Side dishes are sometimes tricky to me because I like them to be quick but I also like to visit "flavor country". Hub and I find that whenever we sit down to our meal, we always dig into the sides first! I don't know what it is but we do. So here is a super easy potato dish that you can substitute, adjust and enjoy to your liking for very minimal amount of preparation!
Easy-Bake Potatoes
Prep: 5 mins
Cook: 1hr.
Oven: 400 degrees
Serves: 2 (adjust accordingly to serve more)
5-6 medium sized red potatoes
3 cloves garlic, halved
3-4 green onions, chopped (or substitute half of a medium-sized yellow onion)
4 Tbsp. butter, cut into pieces
1 tsp. salt
1 tsp. pepper
1/2 tsp. garlic salt
1. Preheat oven to 400 degrees.
2. Create a foil pouch in a glass baking pan. I usually line the pan with two pieces of foil and then once all ingredients are added bring all sides of foil together to close.
3. Chop potatoes in half or in quarters depending on size, or how big you like your potatoes.
4. Place potatoes in foil pouch and add garlic, green onions, butter, salt, pepper and garlic salt.
5. Bake for 1 hr. If these sides are done a little early, turn the oven down to 200 degrees for up to half an hour to keep until you're ready to enjoy!
*Substitute any potatoes that you like. When substituting sweet potatoes, sprinkle in 1/4 cup brown sugar. Add any seasonings you like (i.e. cayenne pepper, Italian seasonings, steak/grill seasoning, seasoning salt, etc.)
The great thing about potatoes is that they are so versatile! Serve these with a roast, BBQ, with hamburgers instead of french fries or even with a scramble for breakfast! Happy cooking!
Giveaway By Glamorous!
Hop on over to The Glamorous Life of a Housewife to take a peek at her adorable giveaway!
Happy Tuesday!
Happy Tuesday!
Sunday, October 10, 2010
A Little Sticking to the Pot is Allowed In This One
My friend, CD, has been talking about this potsticker recipe for some time now. She always comes to work talking about how she "whipped up" this dinner before she came in for her family to enjoy while she is gone. Well, you know I like a simple, tasty recipe so I finally got it out of her! Thanks, CD, for the recipe!
Potstickers
Makes: about 20
Prep: 30 min. (can be prepared ahead of time)
Cook Time: 30 min.
1 lb. unseasoned ground pork
3-4 chopped green onions
3 cloves garlic
1 can waterchestnuts
1/3 cup cabbage
1/2 tsp. ground ginger
1/4 tsp. salt
1 Tbsp. sesame oil
1 pkg. Won Ton Wrappers
1 can chicken broth
Oil to coat the bottom of pan
1. In a large bowl mix pork, green onions, garlic, waterchestnuts, cabbage, ground ginger, salt and sesame oil.
2. Lay out wrappers on a clean surface.
3. Roll meat mixture into tablespoon sized balls and lay into the middle of all wrappers.

4. Brush the perimeter of each wrapper with warm water and fold all four corners (teepee style) or one corner to another (triangle style) together.>

5. Heat pan with oil over medium heat. Once the oil is hot, add potstickers. Brown the potstickers for about 10-15 minutes. They will turn brown and crispy. Make sure sausage cooks all the way through.

6. Once the potstickers have had a chance to brown, add about 1/2 can of chicken broth and cover the pan and reduce heat to low-medium. Let steam for about 10-15 minutes.
The potstickers should be soft.
Dipping sauce: (Can be made ahead of time)
1/3 cup soy sauce
3 cloves garlic
4 Tbsp. sugar
Cayenne pepper or Siracha (garlic-chili paste) to taste
Mix Ingredients together, microwave until sauce reaches a syrup consistency. If sauce is too thin, add sugar, if sauce is too thick, add soy sauce.

Friday, October 8, 2010
Oh my Hummus, it's Friday!
I don't know what it is about a Friday evening that makes me want to relax, enjoy a drink (alcoholic or not) and some yummy tidbits. My parents do it. Hub's parents do it. Maybe that's where I get it! I came across the recipe for Hummus randomly on the back of the Cumin spice container. I tried it. I loved it. I'm sharing it.
Hummus
1 can drained Chick Peas (Garbonzo beans), reserve 1/4 cup of the liquid
1 clove garlic (We like garlic, I bump my measurement up to 4 cloves)
1 teaspoon cumin (I like cumin, I bump it up to 2 tsp.)
1/4 teaspoon each of ground red pepper (cayenne) and salt (again, you can adjust these measurements to your own taste, i.e. we like a little spicy, I dash in some more cayenne)
1 tablespoon lemon juice
Olive Oil
1. Pour chick peas, garlic, cumin, salt, red pepper, and lemon juice into food processor.

2. Pulse a few times to grind up ingredients.
3. Add reserved chick pea liquid and pulse until smooth.
4. If you are not satisfied with consistency (should be smooth), stream in olive oil until smooth.
Serve with pita chips, crackers, fresh veggies or whatever it is you enjoy dipping in Hummus!

I found these delicious Sweet Potato and Corn Tortilla Chips at the store. There are several variations to this recipe to tweak it up a bit. I have added sun-dried tomatoes and roasted garlic on different occasions. Although it is easy to stop into the store the next time you are headed to a get-together and grab a container of hummus and a bag of chips, as you can see above, with just a little extra effort for less money, you can wow your friends with this simple hummus recipe!
Hummus

1 can drained Chick Peas (Garbonzo beans), reserve 1/4 cup of the liquid
1 clove garlic (We like garlic, I bump my measurement up to 4 cloves)
1 teaspoon cumin (I like cumin, I bump it up to 2 tsp.)
1/4 teaspoon each of ground red pepper (cayenne) and salt (again, you can adjust these measurements to your own taste, i.e. we like a little spicy, I dash in some more cayenne)
1 tablespoon lemon juice
Olive Oil
1. Pour chick peas, garlic, cumin, salt, red pepper, and lemon juice into food processor.

2. Pulse a few times to grind up ingredients.
3. Add reserved chick pea liquid and pulse until smooth.
4. If you are not satisfied with consistency (should be smooth), stream in olive oil until smooth.
Serve with pita chips, crackers, fresh veggies or whatever it is you enjoy dipping in Hummus!

I found these delicious Sweet Potato and Corn Tortilla Chips at the store. There are several variations to this recipe to tweak it up a bit. I have added sun-dried tomatoes and roasted garlic on different occasions. Although it is easy to stop into the store the next time you are headed to a get-together and grab a container of hummus and a bag of chips, as you can see above, with just a little extra effort for less money, you can wow your friends with this simple hummus recipe!
Monday, October 4, 2010
Banana Bread
I just love cooking (and baking). The mixing of the ingredients, scrounging around the kitchen to see what I have to throw together and putting them all together to make something (hopefully) delicious! Well, today's recipe (thanks to the over-ripened fruit on my counter) is a simple, Banana Bread. Something about banana bread reminds me of fall and winter. Maybe it's because I tend not to do as much baking in the summer but for whatever the reason, the smell of baking cinnamon and nutmeg is enough to bring the coziness of fall. So, here is the recipe, courtesy of my beloved:

Banana Bread
Prep: 25 minutes Bake: 55 minutes
Oven: 350 degrees Makes: 1 loaf
2 cups all-purpose flour
1 1/2 teaspoons baking powder
1/2 teaspoon baking soda
1/4 teaspoon salt
1/4 teaspoon ground cinnamon
1/8 teaspoon ground nutmeg
2 eggs, beaten
1 1/2 cups mashed ripe banana (5 medium)
1 cup sugar
1/2 cup cooking oil or melted butter or margarine
1/4 cup chopped walnuts
1 recipe Streusel-Nut Topping (optional)
1. Preheat oven to 350 degrees. Grease bottom and 1/2 inch up the sides of one 9x5x3-inch or two 7 1/2x3 1/2x2-inch loaf pans; set aside. In a large bowl combine flour, baking powder, baking soda, salt, cinnamon and nutmeg. Make a well in center of flour mixture; set aside.

2. In a medium bowl combine eggs, banana, sugar and oil. Add egg mixture all at once to flour mixture. Stir just until moistened (batter should be lumpy. Fold in walnuts. Spoon batter into prepared pan(s). If desired sprinkle Streusel-Nut Topping over batter in pan(s).

3. Bake for 55 to 60 minutes for 9x5x3-inch pan or 40 to 45 minutes for 7 1/2x3 1/2x2-inch pans or until a wooden toothpick inserted near center comes out clean (if necessary, cover loosely with foil the last 15 minutes of baking to prevent overbrowning).Cool in pan on wire rack for 10 minutes. Remove from pan. Cool completely on rack. Wrap; store overnight before slicing.
Streusel-Nut Topping: In a small bowl combine 1/4 cup packed brown sugar and 3 tablespoons all-purpose flour. Using a pastry blender, cut in 2 tablespoons butter until mixture resembles coarse crumbs. Stir in 1/3 cup chopped walnuts.
Enjoy!

Subscribe to:
Posts (Atom)